Watcher Window |
  
|
Watcher Window |
|
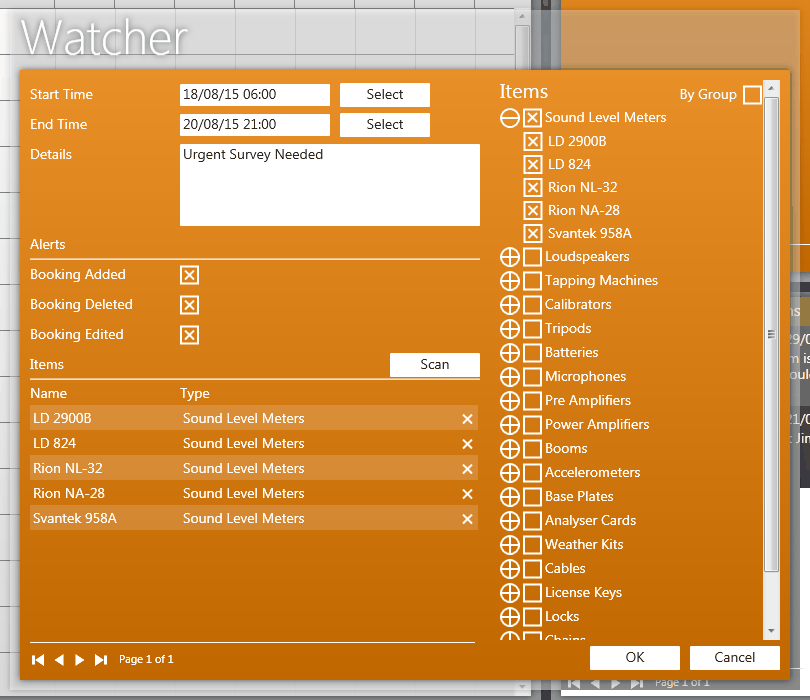
The Watcher window is where you enter or modify the details or your watcher. There are a number of ways to create or edit watchers (see Creating Watchers and Editing Watchers).
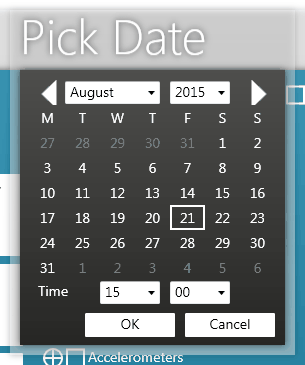
The Start Time is the time you want your watcher to start alerting for changes. You can either enter the date and time manually, or select a date and time by clicking on the Select button, at which point the Date Chooser will be opened.
The End Time is the time you want your watcher to start alerting for changes.
The details of the watcher, such as the reason you are watching equipment.
The alerts check boxes specify the type of activity you would like to receive alerts for. These are as follows:
-Booking Added: You will be notified if a booking is added during the time period of your watcher.
-Booking Deleted: You will be notified if a booking is deleted during the time period of your watcher.
-Booking Edited: You will be notified if a booking is edited during the time period of your watcher.
The Items table shows the equipment included within the watcher. Items can be added by checking the relevant box in the accordion on the right-hand side of the window. Equipment can be viewed in the accordion by Type (default) or Group (by checking the Group check box). Checking the box beside the Type or Group label will add or remove all items in the Type or Group. Items can either be removed from the watcher by un-checking the check box, or by clicking the 'X' to the right of the item in the Items table.
Equipment can be added or removed from your watcher by scanning the barcode of the item. To do this, click the 'Scan' button in the watcher window, then use your barcode scanner to scan the items barcode.